Monday, January 20, 2014

Soldering Tattoo Needles (Part One)

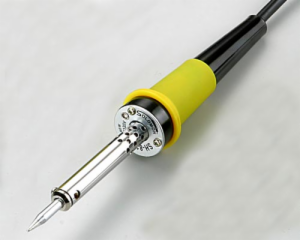
Tattooing can be expensive, but you can cut costs by educating yourself in certain subjects — for example, you can save money by soldering your own tattoo needles. Buying pre-made and -sterilized tattoo needles is commonplace these days, but there was a time when every apprentice had to solder their own needles. If you’re going to be a good tattoo artist, you need to know the tools of your trade, and making your own needles is a great way to better understand your craft. You’ll need to purchase a soldering station or soldering iron if you don’t already own one.
When we talk about a tattoo needles, we’re not talking
about a single needle like the kind you see at the doctor’s office — we’re talking about a group of needles soldered to a needle bar. The needles have different diameters, lengths, and tapers. There are also textured needles, which have pits in the needle for potentially carrying more ink.
You create tattoo needles by soldering a group of needles to a needle bar or back stem. The needle bars are around four-and-a-half to five inches long, and all needle bars designed for tattooing have a loop or eyelet at one end. The needle groups can be made into whatever shape you want, but the most commonly used groupings are flats, magnums, and rounds. Flats are used for shading, magnums for fill work, and rounds for line or portrait work.
You make rounds by soldering the needles in a circular pattern. Tight rounds are best for line work; loose rounds are better for shading. You solder needles side-by-side in a row to create flats. Flats can be tight or loose as well, though most tattoo artists prefer loose groupings for shading. Magnums are soldered side-by-side like flats, but they are separated into lower and upper rows, or they are double stacked.
Making your own tattoo needles is a painstaking process, at least in the beginning, and you’ll need to have the proper equipment before you can get started. In addition to your soldering station or iron, you’ll also need solderflux, and you may want different soldering iron tips for cleaner solder joints. You will need to tin a new or dirty soldering iron tip, which involves coating the soldering tip with a thin layer of solder. Whether you buy or make your own needles, they must be individually packaged and autoclaved before use.
(Continued in Part Two, which you can read here.)

Wednesday, July 17, 2013

Temperature-Controlled Soldering Irons

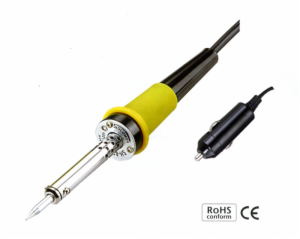
Chances are you learned to solder using a cheap pencil-type soldering iron. The bad news is that not only is this type of soldering iron a lousy tool to learn with, pencil-type irons are not recommend for any important solder work, and the reason is simple: a pencil-type soldering iron does not have a thermostat, which is to say it’s always on, making the soldering iron hot to the touch; in addition, a pencil-type iron will not heat, for example, components very well — if the iron had sufficient power, it would destroy itself, since it is on all the time.
As if that was not enough, the soldering iron tip is typically hotter than it needs to be, so it will not cool too quickly when you apply the solder, meaning that the solder on the iron’s tip oxidizes rapidly. The excessive tip heat results in poor thermal conductivity, making the soldering process more difficult. Because the soldering iron tip cools rather quickly when you do finally apply solder, the soldering iron may not have enough heat capacity to heat the circuit board enough to make a proper solder joint, unless you hold the iron to the board for a longer amount of time. Time is not on your side when you solder: the longer you hold the soldering iron to the circuit board, the greater the chance that you will damage components or the board itself.
For the reasons stated above, you should consider investing in a temperature-controlled soldering iron. These irons have a thermostat that switches off the heater once the selected temperature is reached, meaning these irons are capable of housing a more powerful heating element, which speeds up the heating application process. When you are not using the iron, the element uses just enough power to maintain the temperature setting and will not overheat, thus keeping the soldering iron tip in better shape. Another benefit of using a temperature-controlled soldering iron is that you can set the appropriate temperature for the type of solder you are working with — for example, you will need more heat for lead-free solder. You can also turn down the temperature when you are soldering delicate or heat-sensitive parts and turn it up when you are working on large or heat-conductive terminals.
Although the sophistication of a temperature-controlled soldering iron will cost you a little more, I think you will find it worthwhile in the long run. This type of soldering iron is especially useful for beginners because it will really speed up the learning process. Some soldering irons may at first glance appear to be temperature-controlled, but they may only be adjustable; because they are open-loop the temperature is not actually controlled at all.

Wednesday, June 12, 2013

Soldering Safety

If you are working on an electronics project, you are probably soldering. Soldering can be dangerous: solder produces toxic fumes, your soldering iron is extremely hot, the solder gets very hot as well, and you may get air pockets or impurities that can pop as you heat the solder, sending molten solder flying unexpectedly and unpredictably. Because of these potential hazards, you need to follow some rules while soldering.
1) Wear goggles to protect your eyes. You must be careful when you trim leads or solder dross because a flyaway could injure you and others working in the vici
nity.
2) Never inhale fumes while soldering. Always work in a well-ventilated space, preferably with a fume extractor.
3) You must return the soldering iron to its stand (if you have a soldering station, it will be built-in) when you are not using it — do not leave it sitting on your workbench for any amount of time. The soldering iron tip is around four hundred degrees Celsius, so be careful; avoid touching wire insulation, plastic, and all other nearby flammable materials with the soldering iron. If you won’t be using the soldering iron for a few minutes, switch the soldering station to standby or turn off your soldering iron. Once you have finished soldering, turn off the unit and/or unplug it.
4) Another important way to avoid nasty burns is to use helping hands, clamps, pliers, tweezers, or a circuit board vice to hold your components. Ensure that your arms and legs are covered to avoid being burned by splashed solder.
5) Keep food and drink away from the working area. Traditional solder is a tin/lead alloy, and the lead is toxic. Flux is used to help metal pieces stay soldered together, and it is both acidic and toxic: flux will damage clothing and cause acid burns to your skin which, if they occur, you should immediately flush with water. If you spill any flux, clean it up immediately. Be sure to wash your hands after soldering.
6) Always thoroughly wash your hands after you have handled flux or leaded solder. Use lead-free solder — if you can — to reduce potential hazards.
7) After you’ve finished soldering, completely clean the area and discard any leftover lead and silver solder as well as dross in a lidded container, and then label the container (e.g. “Solder Waste”). Contaminated rags and solder sponges should be discarded as hazardous waste.

Monday, June 3, 2013

A Digital Storage Oscilloscope (DSO) for under $70.00

The Hantek 6022BE  Digital Oscilloscope is a fully functional Digital Storage Oscilloscope (DSO) priced at less than $70.00. This unit is designed to operate with a personal computer which greatly reduces the cost of manufacture by using the Computer Screen as the display and the keyboard as the function controls.

The Hantek 6022BE  oscilloscope features a 20 Mhz bandwidth with a 48 MSa/sec sampling rate, which is suitable for general electronics use. This provides sufficient capability for viewing a multitude of waveforms encountered in design, servicing, and educational environments.

Although this model does not have external triggering c
apabilities, it does not limit the usefulness since Channel 2 could be used as an external trigger input. The oscilloscope features various trigger modes and settings, including auto, normal and single.

Even though this is a low cost unit, it still features various mathematical operations that may be performed on the waveforms applied to the two channels. The operations available are Addition (CH1+CH2), Subtraction (CH1-CH2 or CH2-CH1), Multiplication (CH1 * CH2), Division (CH1/CH2 or CH2/CH1), and Fast Fourier Transform (FFT). The FFT operation is useful for observing the frequency content of the waveform.

The Hantek 6022BE  Digital Oscilloscope was found to be easy to use and included features not normally found on units in this price range. The unit performed at or better than the published specifications through all of the available functions. If higher Bandwidth is required, Circuit Specialists offers models ranging from 20 Mhz up to 200 Mhz.

Wednesday, May 15, 2013

Caring for Your Soldering Iron Tip


Most contemporary soldering iron tips are made of a copper core surrounded by iron that is nickel- or chrome-plated. The plating on the chisel’s tip is removed, thus exposing the iron cladding, and solder doesn’t stick to the nickel/chrome. Solder will, however, stick to the soldering iron. Keep the tip coated with a thin layer of tin so that it will not rust and so that you receive the optimal heat at the tip, which will in turn extend the life of the soldering iron tip as well as improve performance.
Because solder can build up on your tip and reduce heat transfer, which makes it more difficult to solder, be sure to use high-quality solder. Note that 60/40, 50/50, 63/37, and lead-free solder have different working ranges. Keep the tip of your soldering iron clean while you work: wipe the tip on a damp sponge (if you have a soldering station you should have one built-in) to keep it clean and ensure maximum heat at the tip. Alternatively, you can use metal mesh pads to clean the tip of your soldering iron.
While you want to keep the tip clean, excessively wiping it on a damp sponge can lead to premature tip failure, because the tip temperature will rise and fall dramatically, causing the metal to expand and contract. This cycle will cause the metal to fatigue and the tip will eventually collapse. The more you wipe the soldering iron tip, the more you stress the metal.
Flux is corrosive, so don’t try to clean the tip by dipping it in flux. Also, never clean with sandpaper or other abrasive materials. Minimize tip maintenance by using a quality solder with high tin content and high-purity metal. When you finish a soldering session, clean the tip, flood the tip with preferably 63/37 or 60/40 solder, wipe it clean again, and unplug the soldering iron in order to flush and re-tin the tip, which protects it from oxidation and corrosion.
You can keep the tip from seizing (i.e. becoming stuck in the barrel) by loosening the nut or screw securing it. It’s easy to damage the heating element when you try to remove a seized tip. Make sure the tip is properly seated when reinserting the tip.
If you blacken your soldering iron tip and you can’t clean it with your sponge, you can use a tinning block or a brass brush. Tinning block is a self-ammoniac which you use by rubbing the tip of your hot soldering iron through a small amount of flux you place on the block. You then wipe the tip on a damp sponge to remove the debris. If your tip is especially dirty, you may have to repeat this process several times. Keep in mind that tinning block is abrasive and frequent use will wear away the iron cladding prematurely, thus exposing the copper core and ruining the tip.

Thursday, April 11, 2013

Frequency Counter Primer


Frequency counters are easy to use: simply turn on the device and apply the signal to the input. You can use your frequency counter and timer to measure a variety of signals including digital logic signals, radio frequency, and even microwaves. Because of improvements in technology, frequency counters and timers enable you to measure time intervals and frequency, which have an inverse relationship.
You’ll need to apply the signal to the input to measure a time interval or frequency. The next step will be to select the timebase interval, which commonly has the options of point one, one, and ten second(s). These options refer to the time over which the frequency counter gate opens and passing pulses are counted; for example a gate time of one second will count one million pulses for a one megahertz signal or, if five pulses are counted with a gate time of one second, the frequency will be five hertz.
Your frequency counter counts the transition every time the signal passes in the positive direction through the device. More pulses are counted at higher frequencies as you can see from our the example above in which five pulses are counted.
You’ll get more accurate results with longer gate times. Let’s use the previous example with a gate time of point one second for five pulses and a fifty hertz signal. The handheld frequency counter can’t tell the difference between a fifty hertz and fifty-five hertz signal. To get a more accurate reading you can use a one second gate time, thus enabling fifty-five counts for a fifty-five hertz signal.
While longer gate times improve accuracy, your choice of gate time will normally depend on how quickly you need updates for the frequency. Despite the benefits to accuracy longer gate times can slow testing to too great an extent. Because of these tradeoffs in time versus accuracy, you’ll usually use shorter gate times unless you need a high level of accuracy for a particular test.

Wednesday, April 3, 2013

Multimeter Features Guide


There are a number of different features that differ from one multimeter to the next, some of which you’ll often use and others you may never use.
The most important feature is continuity, which allows you to test whether two things are electrically connected. Continuity testing with a peizo buzzer enables you to determine if your soldering is good, a wire is broken in the middle, and something isn’t connected in addition to allowing you to reverse-engineer or verify a design to a schematic.
Some other important features are resistance testing down to ten ohms or lower and up to one megaohm or higher, direct current voltage testing down to one hundred millivolts or lower and up to fifty volts, alternate current testing down to one volt and up to two hundred volts, and diode testing.
Because it’s easy to forget to turn off your multimeter’s power, auto-off is a great feature to have, which you rarely see on budget multimeters. Regardless of this feature you should get in the habit of turning off your multimeter after you finish using it.

If you know how to use it autoranging is a helpful feature and, typically, autoranging multimeters are of higher quality and have more features than simpler multimeters. Keep in mind that with some systems the current or voltage will be too sporadic for the autorange feature to keep up. Some users dislike autoranging because it slower and less precise.
Other optional but useful multimeter features are alternate and direct current testing, a stand for keeping the multimeter upright, a hold function to keep the maximum value on the screen enabling you to use the probes without staring at the screen, and common battery types (such as a nine volt or AAs).
Back-lit LCD multimeters are nice, but chances are you won’t be measuring circuits in the dark. If you need a multimeter that is visible in low light then by all means look for a back-lit model.
You don’t really need fancy probes for you multimeter — just some sturdy, reasonably-priced ones. Your leads will break down over time, generally at the flex point; however, probes are relatively inexpensive, so when you do break a probe, which you eventually will with enough use, you’ll be able to replace it for around five dollars.
Some features you’ll seldom use include a frequency counter, capacitance testing, inductance testing, duty cycle, transistor beta meter, and temperature probe.