The Hantek 6022BE Digital Oscilloscope is a fully functional Digital Storage Oscilloscope (DSO) priced at less than $70.00. This unit is designed to operate with a personal computer which greatly reduces the cost of manufacture by using the Computer Screen as the display and the keyboard as the function controls.
The Hantek 6022BE oscilloscope features a 20 Mhz bandwidth with a 48 MSa/sec sampling rate, which is suitable for general electronics use. This provides sufficient capability for viewing a multitude of waveforms encountered in design, servicing, and educational environments.
Although this model does not have external triggering c
apabilities, it does not limit the usefulness since Channel 2 could be used as an external trigger input. The oscilloscope features various trigger modes and settings, including auto, normal and single.
Even though this is a low cost unit, it still features various mathematical operations that may be performed on the waveforms applied to the two channels. The operations available are Addition (CH1+CH2), Subtraction (CH1-CH2 or CH2-CH1), Multiplication (CH1 * CH2), Division (CH1/CH2 or CH2/CH1), and Fast Fourier Transform (FFT). The FFT operation is useful for observing the frequency content of the waveform.
The Hantek 6022BE Digital Oscilloscope was found to be easy to use and included features not normally found on units in this price range. The unit performed at or better than the published specifications through all of the available functions. If higher Bandwidth is required, Circuit Specialists offers models ranging from 20 Mhz up to 200 Mhz.
Monday, June 3, 2013
Wednesday, May 15, 2013
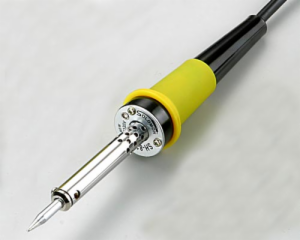
Caring for Your Soldering Iron Tip
Most contemporary soldering iron tips are made of a copper core surrounded by iron that is nickel- or chrome-plated. The plating on the chisel’s tip is removed, thus exposing the iron cladding, and solder doesn’t stick to the nickel/chrome. Solder will, however, stick to the soldering iron. Keep the tip coated with a thin layer of tin so that it will not rust and so that you receive the optimal heat at the tip, which will in turn extend the life of the soldering iron tip as well as improve performance.
Because solder can build up on your tip and reduce heat transfer, which makes it more difficult to solder, be sure to use high-quality solder. Note that 60/40, 50/50, 63/37, and lead-free solder have different working ranges. Keep the tip of your soldering iron clean while you work: wipe the tip on a damp sponge (if you have a soldering station you should have one built-in) to keep it clean and ensure maximum heat at the tip. Alternatively, you can use metal mesh pads to clean the tip of your soldering iron.
While you want to keep the tip clean, excessively wiping it on a damp sponge can lead to premature tip failure, because the tip temperature will rise and fall dramatically, causing the metal to expand and contract. This cycle will cause the metal to fatigue and the tip will eventually collapse. The more you wipe the soldering iron tip, the more you stress the metal.
Flux is corrosive, so don’t try to clean the tip by dipping it in flux. Also, never clean with sandpaper or other abrasive materials. Minimize tip maintenance by using a quality solder with high tin content and high-purity metal. When you finish a soldering session, clean the tip, flood the tip with preferably 63/37 or 60/40 solder, wipe it clean again, and unplug the soldering iron in order to flush and re-tin the tip, which protects it from oxidation and corrosion.
You can keep the tip from seizing (i.e. becoming stuck in the barrel) by loosening the nut or screw securing it. It’s easy to damage the heating element when you try to remove a seized tip. Make sure the tip is properly seated when reinserting the tip.
If you blacken your soldering iron tip and you can’t clean it with your sponge, you can use a tinning block or a brass brush. Tinning block is a self-ammoniac which you use by rubbing the tip of your hot soldering iron through a small amount of flux you place on the block. You then wipe the tip on a damp sponge to remove the debris. If your tip is especially dirty, you may have to repeat this process several times. Keep in mind that tinning block is abrasive and frequent use will wear away the iron cladding prematurely, thus exposing the copper core and ruining the tip.
Thursday, April 11, 2013
Frequency Counter Primer
Frequency counters are easy to use: simply turn on the device and apply the signal to the input. You can use your frequency counter and timer to measure a variety of signals including digital logic signals, radio frequency, and even microwaves. Because of improvements in technology, frequency counters and timers enable you to measure time intervals and frequency, which have an inverse relationship.
You’ll need to apply the signal to the input to measure a time interval or frequency. The next step will be to select the timebase interval, which commonly has the options of point one, one, and ten second(s). These options refer to the time over which the frequency counter gate opens and passing pulses are counted; for example a gate time of one second will count one million pulses for a one megahertz signal or, if five pulses are counted with a gate time of one second, the frequency will be five hertz.
Your frequency counter counts the transition every time the signal passes in the positive direction through the device. More pulses are counted at higher frequencies as you can see from our the example above in which five pulses are counted.
You’ll get more accurate results with longer gate times. Let’s use the previous example with a gate time of point one second for five pulses and a fifty hertz signal. The handheld frequency counter can’t tell the difference between a fifty hertz and fifty-five hertz signal. To get a more accurate reading you can use a one second gate time, thus enabling fifty-five counts for a fifty-five hertz signal.
While longer gate times improve accuracy, your choice of gate time will normally depend on how quickly you need updates for the frequency. Despite the benefits to accuracy longer gate times can slow testing to too great an extent. Because of these tradeoffs in time versus accuracy, you’ll usually use shorter gate times unless you need a high level of accuracy for a particular test.
Wednesday, April 3, 2013
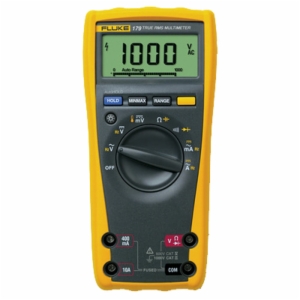
Multimeter Features Guide
There are a number of different features that differ from one multimeter to the next, some of which you’ll often use and others you may never use.
The most important feature is continuity, which allows you to test whether two things are electrically connected. Continuity testing with a peizo buzzer enables you to determine if your soldering is good, a wire is broken in the middle, and something isn’t connected in addition to allowing you to reverse-engineer or verify a design to a schematic.
Some other important features are resistance testing down to ten ohms or lower and up to one megaohm or higher, direct current voltage testing down to one hundred millivolts or lower and up to fifty volts, alternate current testing down to one volt and up to two hundred volts, and diode testing.
Because it’s easy to forget to turn off your multimeter’s power, auto-off is a great feature to have, which you rarely see on budget multimeters. Regardless of this feature you should get in the habit of turning off your multimeter after you finish using it.
If you know how to use it autoranging is a helpful feature and, typically, autoranging multimeters are of higher quality and have more features than simpler multimeters. Keep in mind that with some systems the current or voltage will be too sporadic for the autorange feature to keep up. Some users dislike autoranging because it slower and less precise.
Other optional but useful multimeter features are alternate and direct current testing, a stand for keeping the multimeter upright, a hold function to keep the maximum value on the screen enabling you to use the probes without staring at the screen, and common battery types (such as a nine volt or AAs).
Back-lit LCD multimeters are nice, but chances are you won’t be measuring circuits in the dark. If you need a multimeter that is visible in low light then by all means look for a back-lit model.
You don’t really need fancy probes for you multimeter — just some sturdy, reasonably-priced ones. Your leads will break down over time, generally at the flex point; however, probes are relatively inexpensive, so when you do break a probe, which you eventually will with enough use, you’ll be able to replace it for around five dollars.
Some features you’ll seldom use include a frequency counter, capacitance testing, inductance testing, duty cycle, transistor beta meter, and temperature probe.
Wednesday, March 20, 2013
DIGITAL MULTIMETER TEST ENVIRONMENTS
While digital multimeters are still commonly used in benchtop testing, there are now a number of interconnect options for system integration; e.g., some multimeters offer hobbyists and engineers alike USB interfaces and general purpose interface buses for control via PC using test commands. Certain LabVIEW drivers allow one to integrate one’s multimeter into a larger test system. Then there are front-panel thermocouple inputs which allow one to connect directly to many prevalent temperature measurement sensors.
Indicating a multimeter’s susceptibility to noise, digital multimeters have specifications for normal mode rejection ratio and common mode rejection ratio with common values of over sixty decibels and one hundred twenty decibels. The noise produced by one’s multimeter is particularly important when measuring low signal levels, and electromagnetic interference standards influence compliance levels.
Because of its influence on throughput, a digital multimeter’s measurement speed — typically displayed as readings per second at a specific resolution level — is especially important in production environments.
A number of modern multimeters have resolution levels that one can program, thus simplifying balancing speed and accuracy. The integration period, which is the amount of time when a signal is sampled by the multimeter’s analog-to-digital convertor, is typically displayed in number of power line cycles; number of power line cycles made up of integer multiples — one, five, ten, etc. — will reduce the fifty/sixty hertz line pickup, which is the most common type of noise. One will have greater noise reduction with a larger number value with the caveat that measurementS will take longer to complete.
The number of analog-to-digital conversions averaged for each reading, or digital filtering, can stabilize readings with excess noise but, again, this will slow measurement times.
One’s multimeter measures internal voltages in order to retain stability and accuracy with temperature changes over time when a multimeter’s autozero is used, but overuse of autozero will negatively impact the multimeter’s reading rate. Throughput can be increased by disabling autozero, performing it at certain intervals, or programming the multimeter to use autozero during the load/unload cycle.
Speed specifications like range changing speed, autorange time, and function changing rate might also affect throughput, and hardware triggers are generally faster than software triggers. Certain digital multimeter’s have a microprocessor dedicated to triggers which can significantly reduce latency. Setting or response time is also important when one is testing high-impedance devices.
Speedy and accurate switching is notably important in production test environments, because hundreds or even thousands of devices have to be tested every shift, and newer models support hundreds of multiplexer channels or thousands of matrix crosspoints.
Wednesday, March 13, 2013
PRINTED CIRCUIT BOARD MATERIALS & APPLICATIONS
Using different printed circuit board (PCB) materials will result in different circuit board specifications and prices with regard to PCB prototyping and production. Certain one- or two-layer boards need what is known as pre-preg core — which is a material made from fine layers of fiberglass that is pre-impregnated with a bonding agent or metal core — or several layer boards using two or more kinds of cores for construction. Board thickness varies from a few millimeters thick, for flexible boards, to as much as a quarter inch thick, for heavy burn-in boards. Core materials typically resemble thin double-sided boards with dielectric materials (e.g. fiberglass) as well as copper foil on each side, and they generally come in predetermined thicknesses.
FR4 is the most commonly used type of substrate for circuit boards and is made from a glass-fiber epoxy laminate. FR4 has higher temperature coefficients and lower dielectric constants — e.g. FR4 has a starting thermogravimetry (TG) of one hundred forty degrees Celsius, FR4-06 has a TG of one hundred seventy degrees, and the temperature increases as the family number increases.
Prototypes using metal core, which has impressive heat elimination, are quite popular for light emitting diode (LED) circuit boards. The metal core is an efficient heat sink and keeps the LEDs operating at safe temperatures. One section of a metal core printed circuit board prototype has a metal base, a non-conductive layer (usually aluminum), a copper circuit layer, integrated circuit (IC) components, and a solder mask.
Polyimide printed circuit board prototypes, which are tougher than FR4, can sustain significantly hotter temperatures, making them perfect for most electrical insulation applications. The polyimide is made up of a silicone adhesive and a polyimide film designed to withstand higher temperatures and will protect edge connectors, gold edge fingers (during wave soldering), and reflow soldering (during circuit board assembly). Polyimide can be distinguished from other boards by its distinctive brown color.
Polytetrafluoroethylene (PTFE) or woven glass base circuit board materials necessitate special drilling procedures because Teflon is much softer than, e.g., FR4. These types of materials are far more common than they once were. PTFE/woven glass base materials provide rapid growth of applications operations and easily meet high-frequency demands, and they consistently perform well.
You can also use Arlon materials for longer operating lives at high temperatures, or Isola range circuit board prototypes for broadband circuit designs requiring faster signal speed or better signal fidelity.
Wednesday, March 6, 2013
USING AN OSCILLOSCOPE ON AUTOMOBILES
A digital storage oscilloscope makes it easy to visualize alternating current electrical signals in an automobile. Oscilloscopes have several electrical inputs and control knobs as well as a liquid crystal display (LCD) screen for displaying the signal.
Generally automotive oscilloscopes are used in manufacturing applications by engineers to set electrical signals to the right form. They are also frequently used in garages by mechanics to test the engine’s components for faults. In addition oscilloscopes are increasingly being used by do-it-yourselfers and those looking to make their own automotive repairs. Some examples of electrical signals that one might observe with an oscilloscope are the ignition sequence and the throttle position sensor’s output.
Let’s take a look at how you can use your oscilloscope on your automobile.
Step One
First you’ll need a coaxial cable, which you will connect between the car’s output that you are testing and one of the oscilloscope’s inputs. Most simple digital storage oscilloscopes have two inputs, typically labelled A and B. It doesn’t matter which input you use. You’ll switch the input on by, e.g., pressing either the A or B button.
Step Two
Next you’ll alter the volts/division control in order to change the vertical scale as well as the number of volts for each division. You won’t be able to see the electrical signal clearly on your oscilloscope’s display until you’ve adjusted the settings appropriately.
Step Three
Now it’s time to adjust the oscilloscope’s time/division (also known as timebase) control which changes the number of times each horizontal division is shown. When you know the electrical signal’s frequency you can accurately calculate the time/division. The time for a single period is T=1/f (with f being the frequency). Then you’ll set the time/division to the calculated value using the equation above.
Step Four
The last step is to adjust the vertical position control, which will move the signal up or down on the oscilloscope’s display. Your goal is to center the signal.
By following these four simple steps you can use your digital storage oscilloscope to observe your automobile’s electrical signals.
Subscribe to:
Posts (Atom)